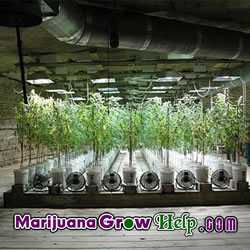
Aeroponic Systems
Aeroponic systems allow growers to produce great marijuana with quick turnover.
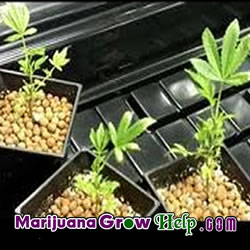
Whether you’re looking for a more reliable system for use in cloning your cannabis crop, or you’re interested in producing the maximum number of clones possible, aeroponic systems are a great resource for the serious grower. Aeroponic systems are especially useful when you want to root clones from a strain that doesn’t usually respond well to traditional cloning methods. Properly managed, most aeroponic systems require little or no oversight after initial setup, and they can produce viable roots in as little as 6 – 8 days.
One of the best aeroponic systems available, and admittedly one of the more expensive, is the EZ Clone system, available from many online retailers including Amazon. The EZ Clone system comes in several sizes, with room for 30, 60 or 120 clones accordingly. For optimum results with the EZ Clone system, be sure to clean it thoroughly between uses and maintain a pH balance of roughly 6.0 – 6.3 for the water / nutrient blend.
The EZ Clone 30 has room for up to 30 clones and comes with a 12 gallon reservoir, so it’s a fairly sizeable setup, and the larger EZ Clone systems come with bigger reservoirs. But if you aren’t ready to invest ~ $250 – $300 in an aeroponic system like the EZ Clone setups, you can still experiment with aeroponics on an affordable scale.
Bloom Brothers Cloner Bucket
Knowing how to grow marijuana with Aeroponic Systems is a great skill to have.
The Bloom Brothers Cloner Bucket, for instance, comes with everything you need to get started with up to 18 clones in a compact 3.5 gallon bucket, and it costs as little as $65. Cuttings should start showing roots in 5 – 10 days, and the Bloom Bucket comes with neoprene inserts to use in lieu of net pots or other cumbersome materials, as well as a decent pump and 15ml of Clonex rooting gel to help get your clones started on the right track.
Whether you opt for a larger system or a smaller aeroponic bucket or bubbler bucket-style system, the results of aeroponic rooting and even full aeroponic growth through the vegetative and flowering cycles, can be quite rewarding. Certainly, as a method for quickly and reliably establishing robust roots, an aeroponic system seems to win hands-down over its competition.
Remember to use a good rooting gel (Clonex is far and away the most popular) in conjunction with your aeroponic system. While you can certainly get good results from an aeroponic system with no extra help, the rooting gel will speed up root production by an average of 2 – 4 days, depending on your specific circumstances.
Aeroponic Systems and Marijuana


 Use a
Use a